Shop Model Trees
 Shop Model Bushes
 Shop Model Grass
Primo Models - Step by Step Guide
This will be the fourth article, this time about creating realistic model rocks. Compared to the previous ones, It will also be relatively short. The entire process consists of five steps.
Needed Materials:
-Silicon mold
-Filling material ( For example Sculptamold)
-Screw
-Vallejo Paint:
*Basalt Grey FS36152
*Stone Grey FS36357
*Silver Grey FS37150
-Paint Brushes
-Natural stones (different grades)
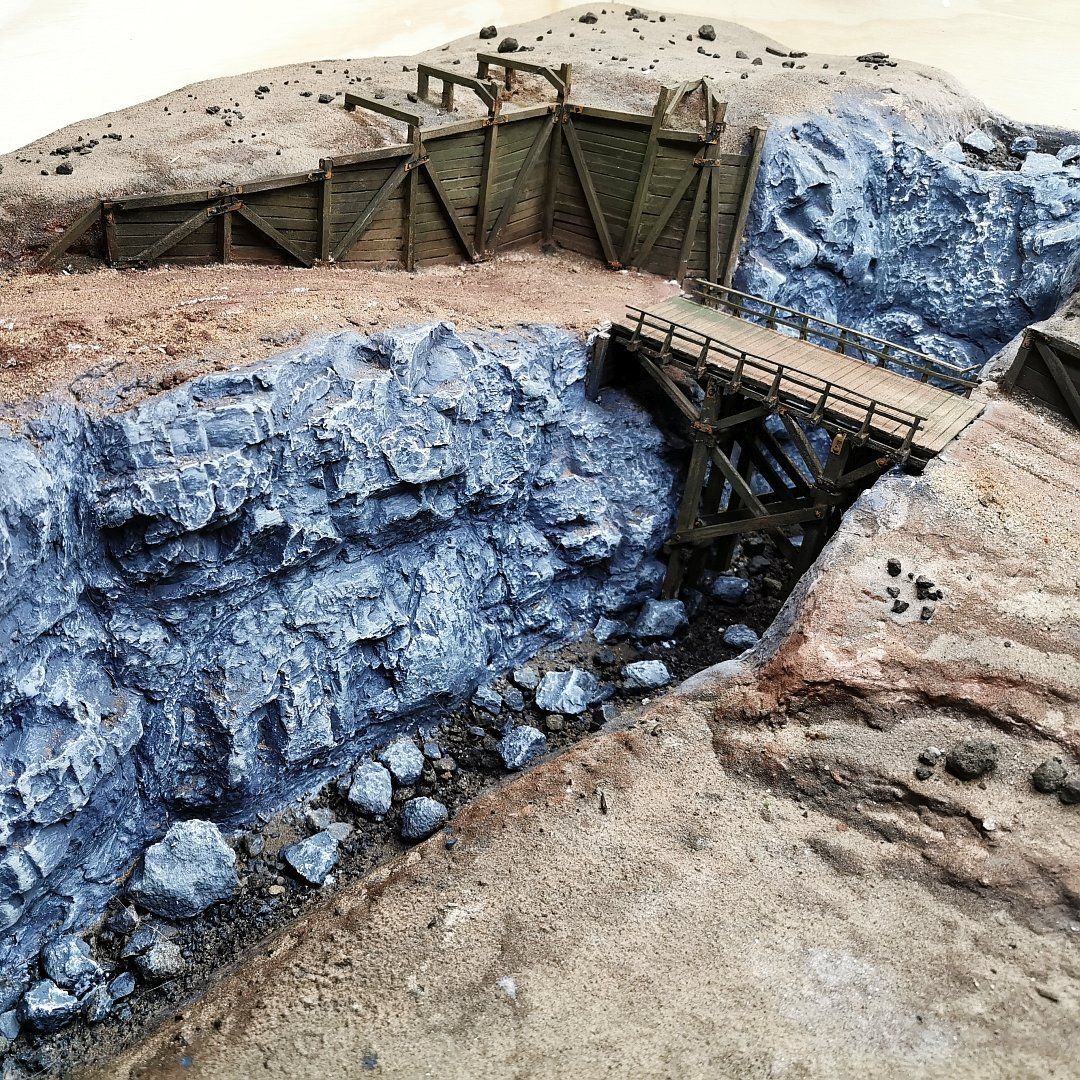
Model Rocks & Cliffs- Step By Step
Step 1
Firstly, please pick up your pre-made rock mold and glue them in the place where you wish the rock to be. Secondly, when the cliff is fully covered, use your stuffing (for example, Sculptamold) to fill the gaps between them. Lastly, wet your hands and clean off excessive filler from the rock molds and spaces between them. Let everything dry.

Step 2
Use the screw and shape the spaces between the rock molds that you have filled in the previous step. There is no right or wrong in doing it. If you find it hard to see the lines you are creating, it could be useful to prepaint the joints before shaping them off. That way, new markings you are making will be better visible for your convenience.

Step 3
Before we start with painting the rocks, in this specific case, we want to prepare the rivered bed of the river that is passing next to the cliffs. For that purpose, we will use different grades of natural stones that will be glued with PVC glue. Always start with smaller rocks and add one bigger one later. Paint the entire area of the cliff and the riverbed carefully using Vallejo Basalt Grey FS36152.

Step 4
By using an almost dry brush, apply Vallejo Stone Grey FS36357. Try to paint only the edges of the rocks.

Step 5
Apply Silver Grey FS37150 by using a dry brush technique. Remember that it is effortless to add more color, but it is hard to reverse the process. Take your time.


As usual, I hope you have enjoyed reading the tutorial and will help you with building your projects. Please do not hesitate to leave any questions in the comments. You can be sure I will respond to them. The next tutorial will be about creating realistic vegetation.
Join Primo Family at:
www.facebook.com/primomodelsuk
www.instagram.com/primomodelsin
Watch Video Tutorial: