Shop Model Trees
 Shop Model Bushes
 Shop Model Grass
Primo Models - Step by Step Guide
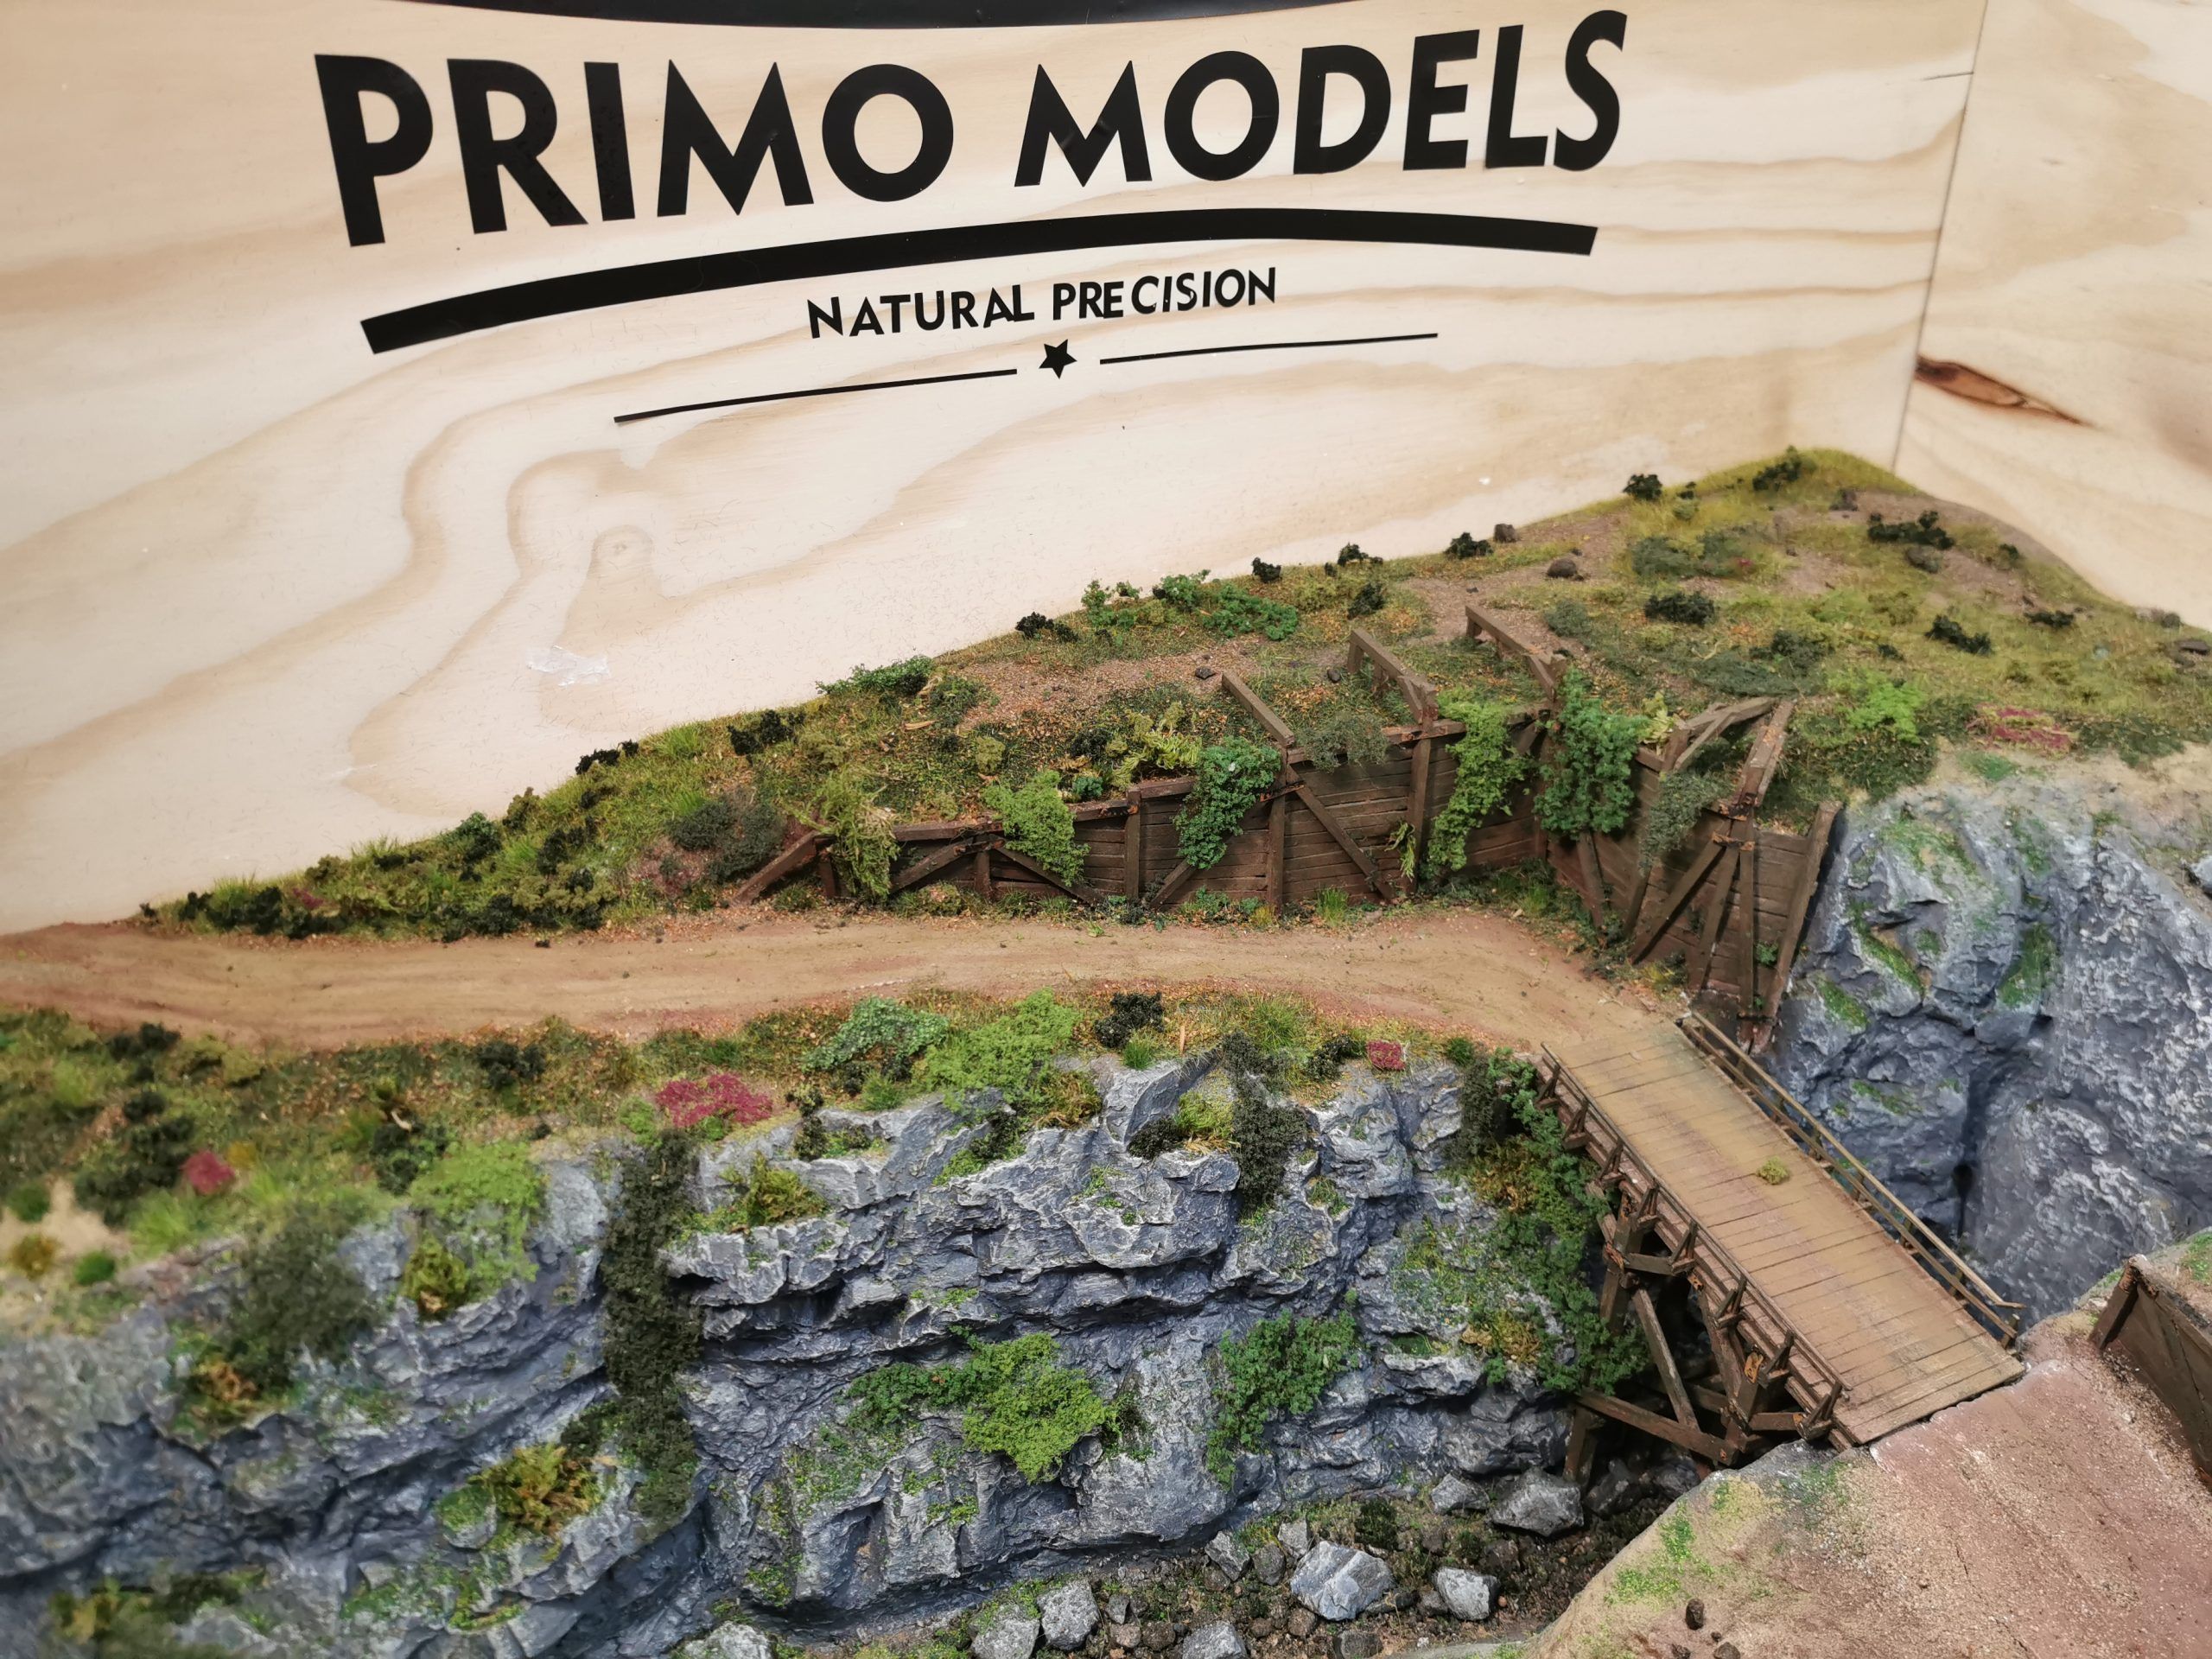
Welcome everybody in the fifth episode of the Primo Models Layout series. The main topic of this part is creating realistic mud roads. However, it will also partially show how to make low vegetation next to the trail. I will not be using any specific catalog numbers when it comes to green scenery. In the next episode, I will go into the details of creating a realistic and natural landscape.
Needed Materials:
-Clay
-Dying powders (Brown)
-Vallejo weathering powders:
*Light Sienna73.104
*Natural Umber 73.109
*Burnt Umber 73.110
-Grass Clumps (soon available on our webpage)
-Static grass
-PVC Glue
-Scenic Spray Glue
Additionally:
-Different scatter materials
-Dried moss
-Different foliage materials
-Ground leaves and bark
Realistic Mud Road- Step By Step
Step 1
First of all, we have to apply a layer of wet clay on the surface where we want the mud road to be. The thickness of the coating depends on how deep the car markings you want to make. Make sure that the edges have a soft slope connection to the surrounding terrain. The same technique can help with creating irrigation canals next to the roads. It would only require a thicker and more significant segment of clay to applied and shaped.

Step 2
Use some very fine brown dust or dying powder to cover the clay. When there are no more white spots around, take your vehicle and drive back and forward a couple of times while applying the pressure on the wheels. The more time you take in shaping the mud road, the more realistic the result you will achieve. It could be beneficial to have a printed picture of mud road similar to the one you want to make.

Step 3
Apply Fine sand with tiny stones if you wish and spread it along the edges and from time to time softly on the road. Use the scenic spray glue to fix everything in place.

Step 4
Apply grass clumps all over the place. In general, the more, the better, most of the wild grass is full of clusters. Do not be afraid to mix different colors close to each other.

Step 5
Apply PVC glue ( I use mod podge) on the surface where you want your grass to be unless you are making a field leave some empty patches from time to time. Later on, it can be covered with leaves, scatter, bushes, or just weathered with “earth” color powder.

Step 6
Now it is a great time to weather our mud road. As a base color, I have used Vallejo Light Sienna. I suggest covering with it everything single empty patch of land. Later on, I softly apply Natural Umber, mainly in the area of car trails. Lastly, I used Burnt Umber on the edges of all “earth” patches and the road.

Step 7
Last but not least, I have applied different kinds of scatter colors and grades. I have focused the intensity of the spread on the road edges where low vegetation can gather some sunlight. Besides using raw scatter or pre-made foliage, you could also cut off some of our tree branches and create tiny bushes that will look much better than course pieces of sponge. An excellent and cheap way of making dry leaves scatter is to ground dry leaves and bark in any blender. Fix everything in place by using scenic spray glue.


As usual, I hope you have enjoyed reading the tutorial and will help you with building your projects. Please do not hesitate to leave any questions in the comments. You can be sure I will respond to them. The next tutorial will be about creating realistic vegetation.
Join Primo Family at:
www.facebook.com/primomodelsuk
www.instagram.com/primomodelsin
Watch Video Tutorial: